
How to Fetch Data in Expo Using Fetch API and Axios
Data fetching in Expo: Axios vs Fetch
a.Expo API Example: Fetching Data Step-by-Step
2.Axios in Expo Apps: How to Fetch Data
a.How to Set Up Axios in Expo for API Requests
b.Using Axios in Expo: API Request Examples
c.How to Use Params with Axios API in Expo
3.Fetch vs Axios
How to Fetch Data in Expo Apps Using the Fetch API
Fetching data from an API is a common task in most React Native applications. In this article, we'll look at how to fetch data using both the built-in fetch method and Axios in a React Native Expo project. If you haven't set up your project yet, make sure to follow the setup and installation guide before continuing.
The approach for fetching data with fetch and Axios is the same in React Native and Expo.
Your Expo app will often need to communicate with external APIs. There are several approaches for making API requests, and we'll start with the most common one: using the fetch() method. For a concise comparison of Axios and fetch, you can read the section below. Although fetch() is simple and easy to use, it requires you to manually process the response and handle errors. In the example below, we'll use the Open Library API to demonstrate how it works.
Expo API Example: Fetching Data Step-by-Step
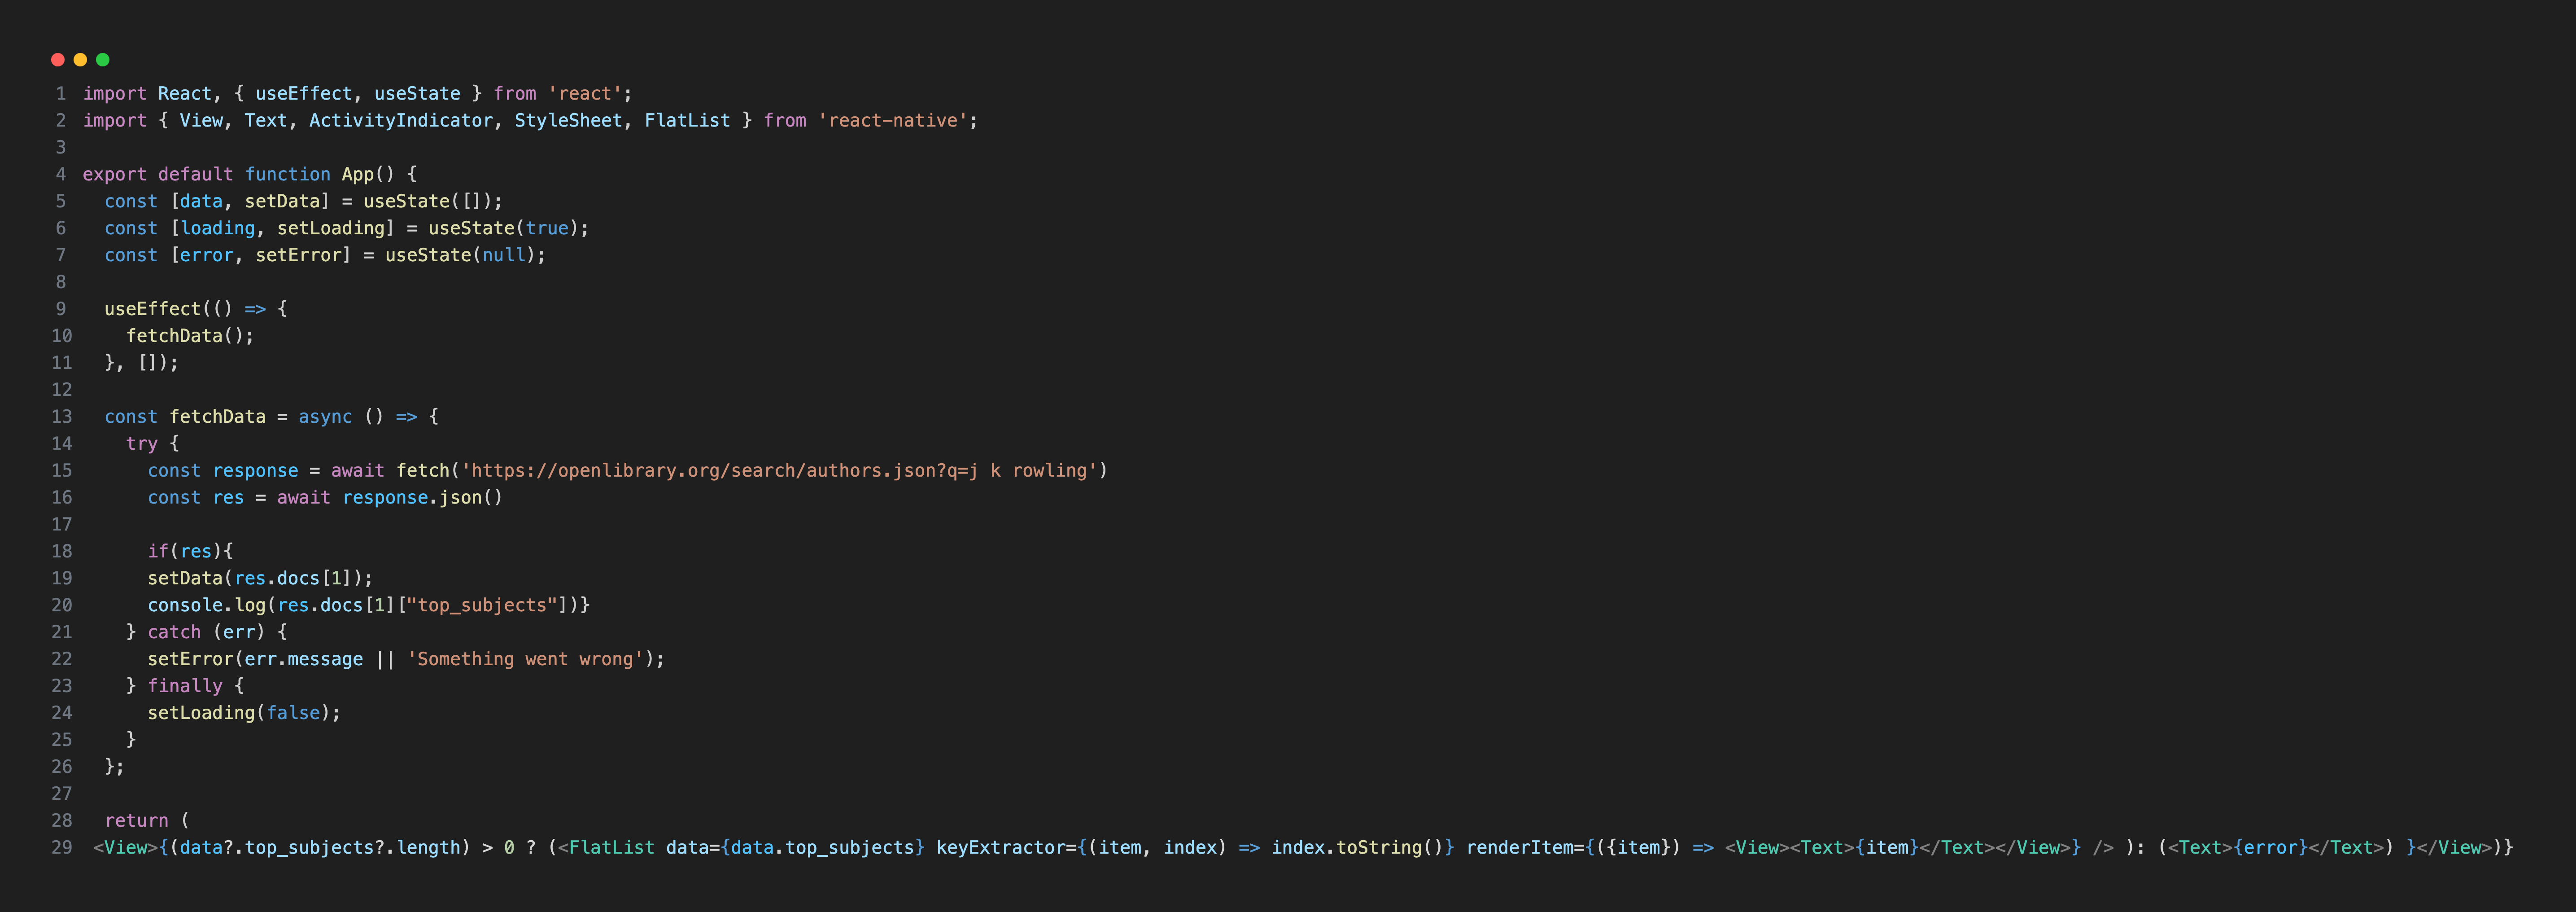
This example is designed to help you understand the basics of working with APIs. You can write your code and try the API endpoint shown above, and because it doesn't require authentication, it's perfect for beginners. Remember to use the json() method to parse the response, and always review the structure of the API response to know which fields you need. In our example, we fetch the first doc (docs[1]) inside docs and access the "top_subjects" field. The fetchData function shows the general syntax for making a request with fetch(). The response is ["Wizards", "Juvenile fiction", "Harry Potter (Fictitious character)"].
The Open Library API is one of the best free resources for learning and testing APIs. If you're practicing API integration, you can also explore many other free public APIs—some that require authentication and others that don't.
Some APIs use authentication keys or query parameters. When that happens, you must embed the authentication token directly into the API endpoint. In the next example, we'll use the Weather API to demonstrate how to add authentication to your requests.
const response = await fetch('http://api.weatherapi.com/v1/forecast.json?key=YOUR_API_KEY&q=Tokyo&days=1&aqi=no&alerts=no')

To access weather data from WeatherAPI.com, you need to sign up and obtain your API key from your account dashboard. When making requests with JavaScript's fetch() method, include your API key in the API URL to avoid errors. The forecast.json method provides forecast data, and parameters such as aqi (air quality) and alerts can be included in the request. Check the official WeatherAPI documentation for other available methods.
In this example, we use Tokyo as the city query. You can also make the city dynamic by allowing users to specify their preferred location using query parameters. This approach works for building interactive weather apps in React Native or Expo.
const response = await fetch(`http://api.weatherapi.com/v1/forecast.json?key=Your_API_KEY&q=${city}&days=1&aqi=no&alerts=no`)
The "city" value should be specified for the q parameter in the forecast.json method. You can use useState to manage the city variable.
Keep in mind that this API uses API keys for authentication. Other APIs may use different authentication methods.
Expo API Data Fetching with Axios
You can also use the Axios library in your Expo app. Axios is used to make HTTP requests. First, install the Axios library:
npm install axios
How to Set Up Axios in Expo for API Requests
You need to set up Axios library in Expo for iOS devices. Open your app.json file and add the following lines inside the ios section. Expo will use these settings to update the app's Info.plist with the required permissions.
API requests do not require additional permissions for Android.
Using Axios in Expo: API Request Examples
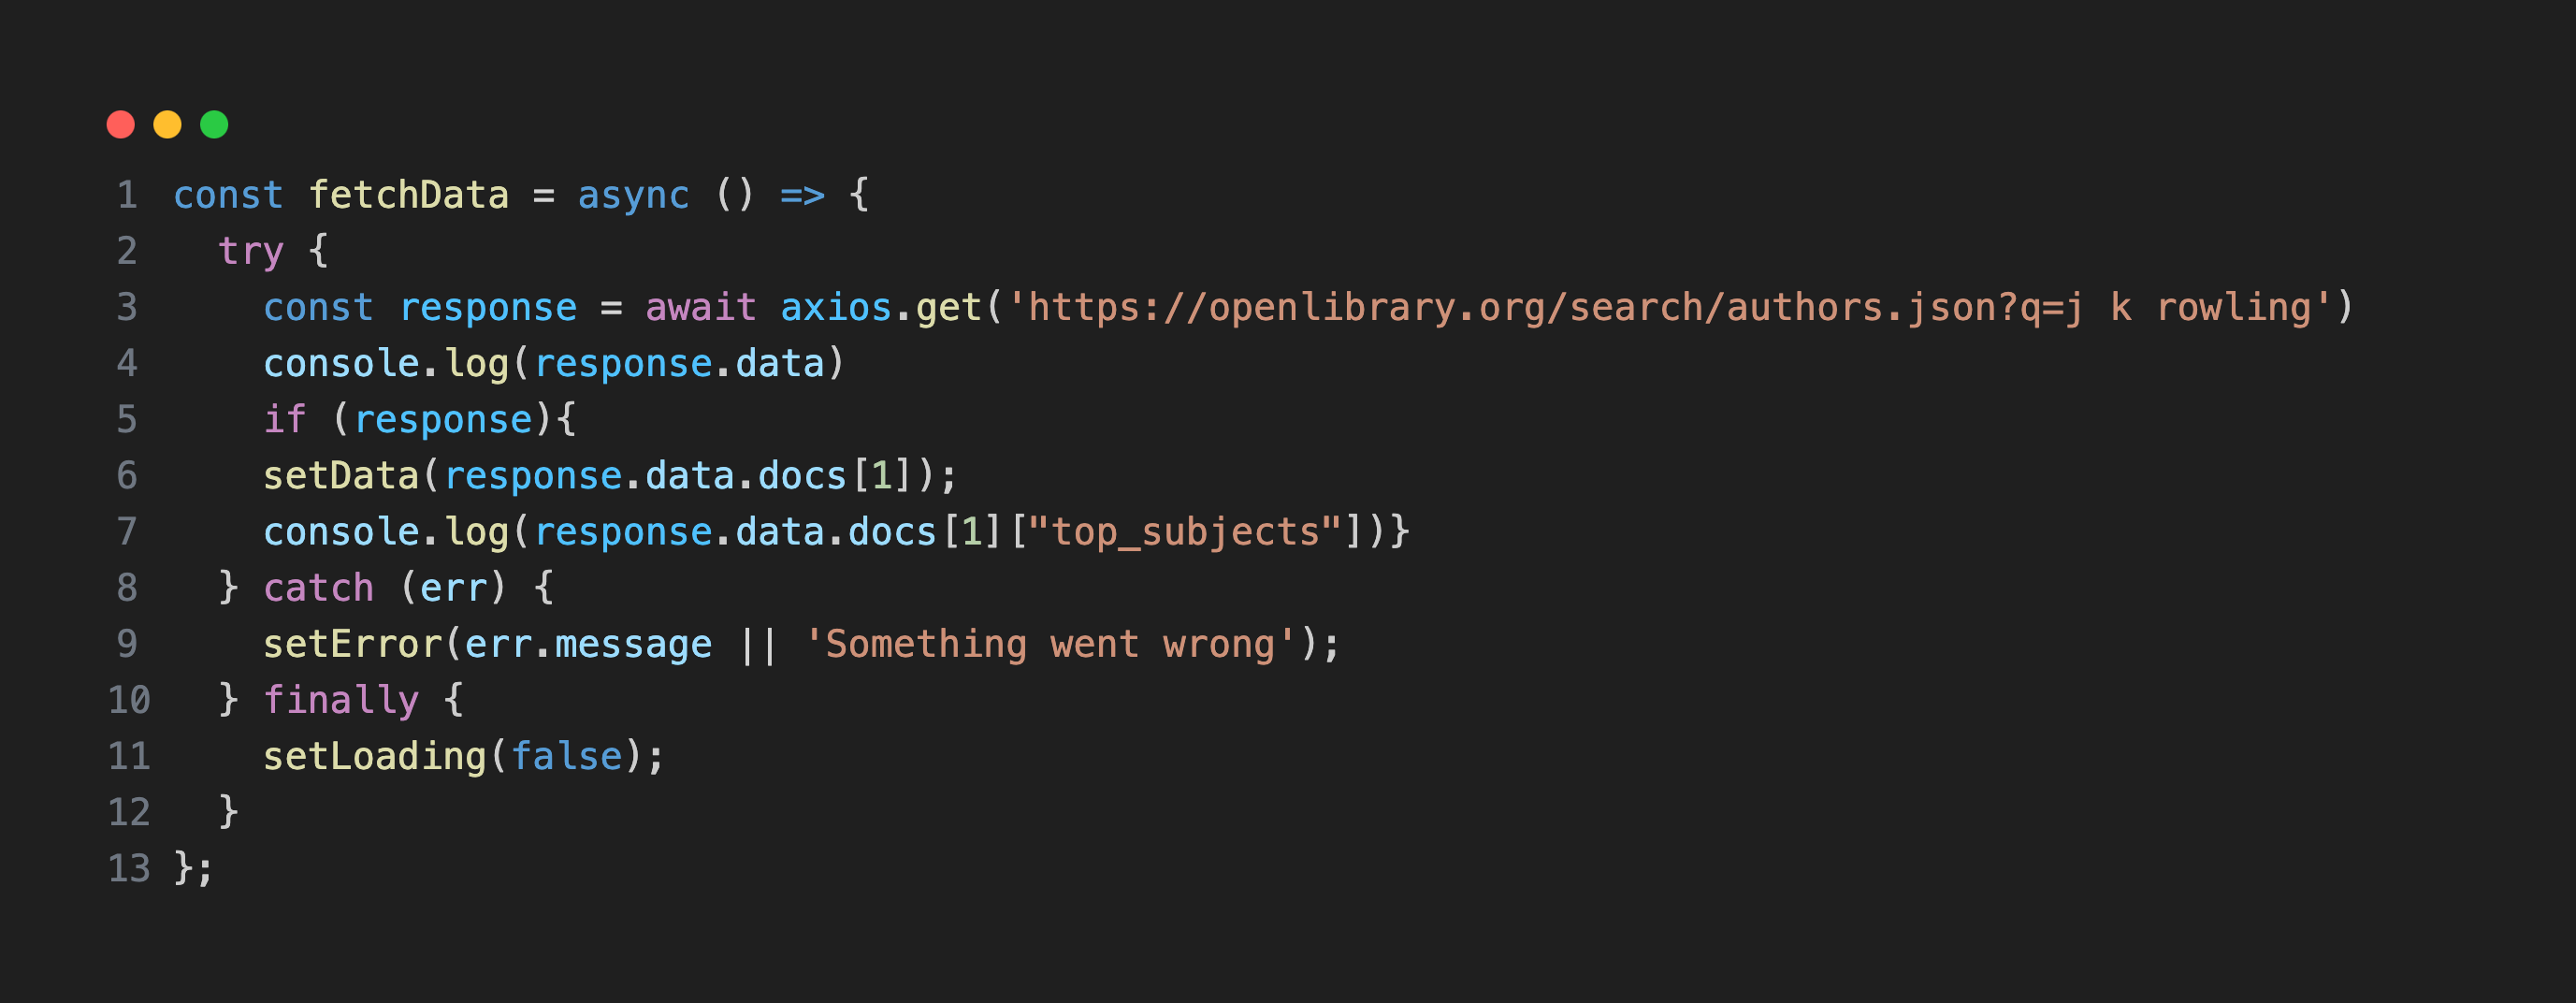
To retrieve data, we will use the axios.get method. Let's recreate the first Open Library example using Axios:
How to Use Params with Axios API in Expo
You can also add query parameters to your Axios requests. params are the URL parameters sent with the request. They can be either a plain object or a URLSearchParams object. For more detailed information, see the Axios API documentation. Let's recreate the Weather API example above, this time using Axios:
Axios Example in Expo: Using URL Params in API Requests
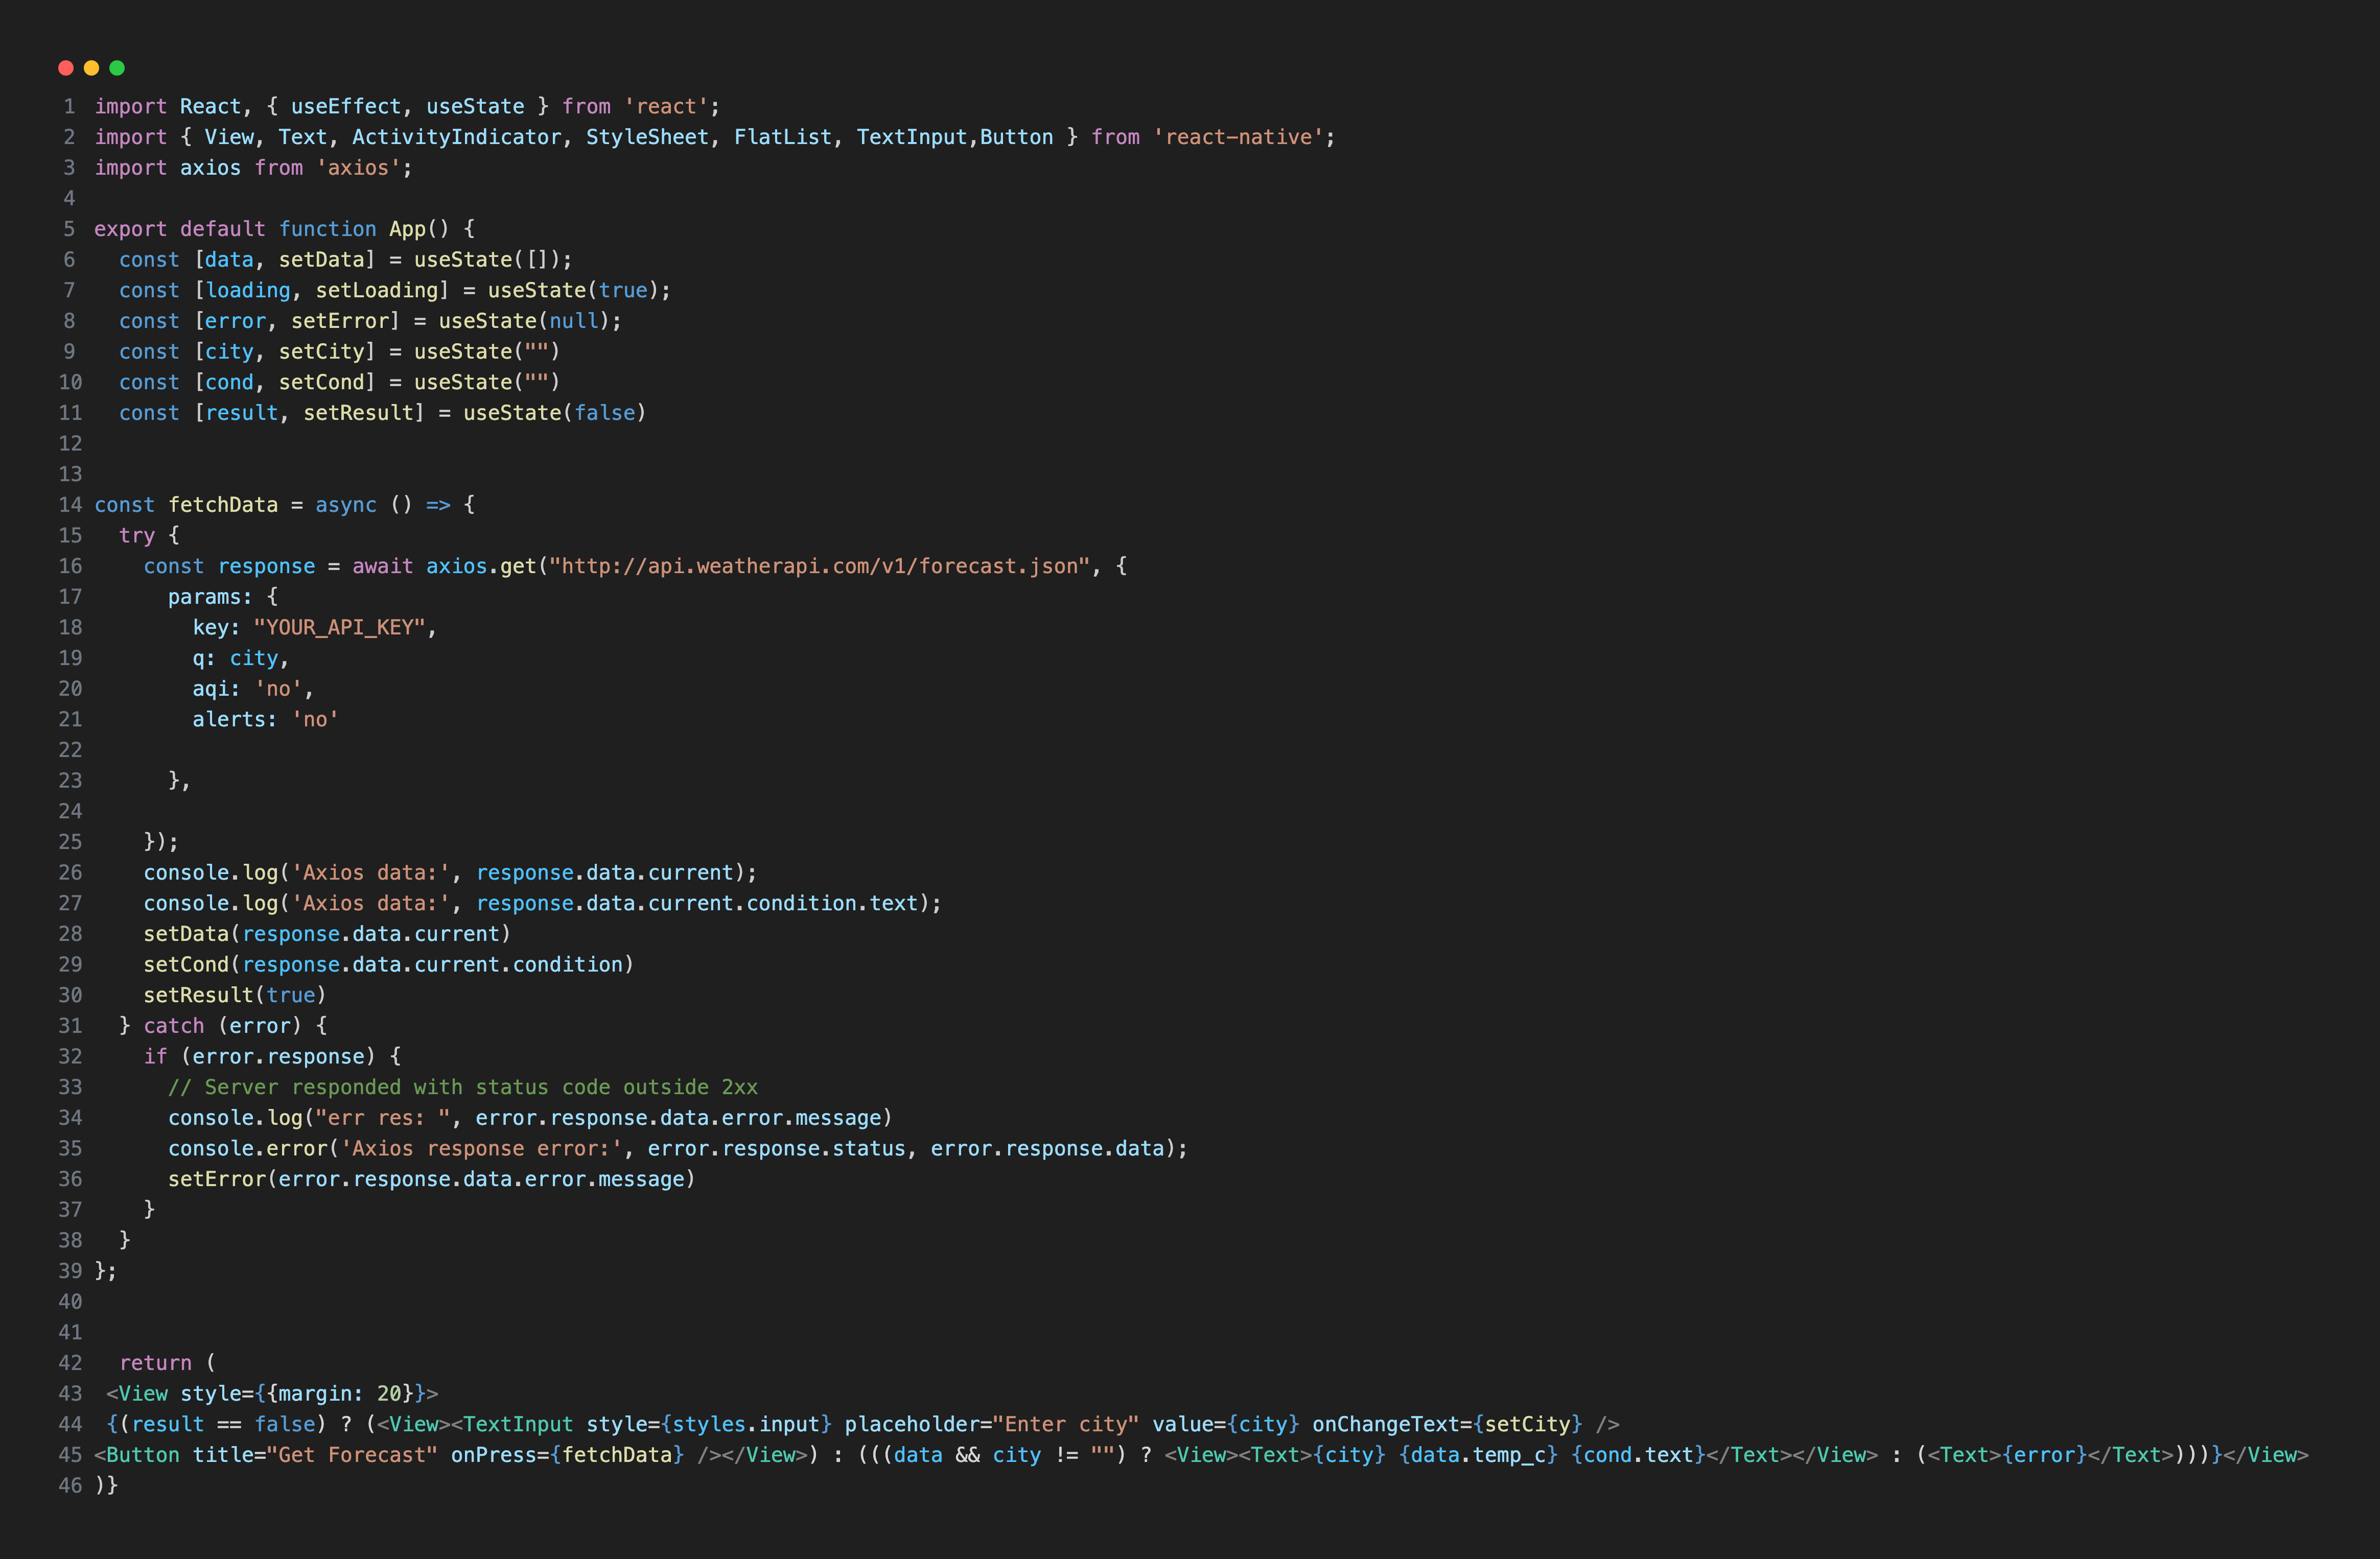
In the example above, we added the "API key" and "city" query as Axios parameters, allowing users to select the city. The forecast.json method returns the current temperature for the selected city. There are also other options—check the available methods in the documentation to retrieve different types of information and include them in params as shown in the example above.
Here is an example of the response you might receive: response.data.current returns {"cloud": 0, "condition": {"code": 1003, "icon": "//cdn.weatherapi.com/weather/64x64/day/116.png", "text": "Partly Cloudy"}, "dewpoint_c": 10.3, "dewpoint_f": 50.5, "diff_rad": 66.7, "dni": 142.03, "feelslike_c": 19.3, "feelslike_f": 66.7, "gti": 32.23, "gust_kph": 15.2, "gust_mph": 9.4, "heatindex_c": 17.8, "heatindex_f": 64, "humidity": 68, "is_day": 1, "last_updated": "2025-11-19 17:30", "last_updated_epoch": 1763562600, "precip_in": 0, "precip_mm": 0, "pressure_in": 30.06, "pressure_mb": 1018, "short_rad": 131.66, "temp_c": 19.3, "temp_f": 66.7, "uv": 0.2, "vis_km": 10, "vis_miles": 6, "wind_degree": 206, "wind_dir": "SSW", "wind_kph": 7.9, "wind_mph": 4.9, "windchill_c": 17.8, "windchill_f": 64}. response.data.current.condition.text returns Partly Cloudy. The data included in the response depends on the parameters you send.
Note: If you encounter an "Error: Network request failed." error (or any other error) despite having the correct code, replace http with https in the API endpoint.
Fetch vs Axios
After exploring both methods, here is a summary of the key differences to help you choose the most suitable option for your project:
• You need to call .json() manually to parse responses in fetch().
• In fetch(), you need to handle errors manually.
• You must manually construct the URL with query parameters in fetch(), while Axios supports a params object for simple parameter handling.
• Both are supported in Expo/React Native projects.
For a deeper understanding of both workflows, take a look at the React Native (Bare) course and the Expo course.