
Material Bottom Tabs in React Navigation using React Native Paper & Vector Icons (Android & iOS)
Material Bottom Tabs in React Navigation provide a modern bottom navigation experience for both Android and iOS apps. Using React Native Paper and Vector Icons, you can achieve platform-consistent styling, including ripple effects and icons. While the API is identical across platforms, Android includes Material-specific animations and elevation, whereas iOS renders slightly differently to match native conventions. In this guide, you'll learn how to implement Material Bottom Tabs with React Navigation, set them up with React Native Paper and Vector Icons, and follow best practices for cross-platform React Native apps.
Before diving into Material Bottom Tabs, make sure your React Native environment is set up correctly. Follow our step-by-step setup guide for both Expo and bare React Native projects.
React Navigation works the same way in both Expo and bare React Native projects, making it easy to implement navigation across platforms. However, the installation process is different depending on your environment. For step-by-step instructions on setting up React Navigation in Expo, check out our Expo setup guide for React Native Navigation.
React Native Navigation Installation
If you have a multiple-page app, users will need to navigate between screens. React Navigation offers different types of navigation. You need to install the following packages:
npm install @react-navigation/native
npm install react-native-screens react-native-safe-area-context
npm install @react-navigation/native-stack
You only need to install the packages you want to use. For the example below, the material bottom tabs are used and you need to install the following packages:
npm install @react-navigation/material-bottom-tabs react-native-paper react-native-vector-icons
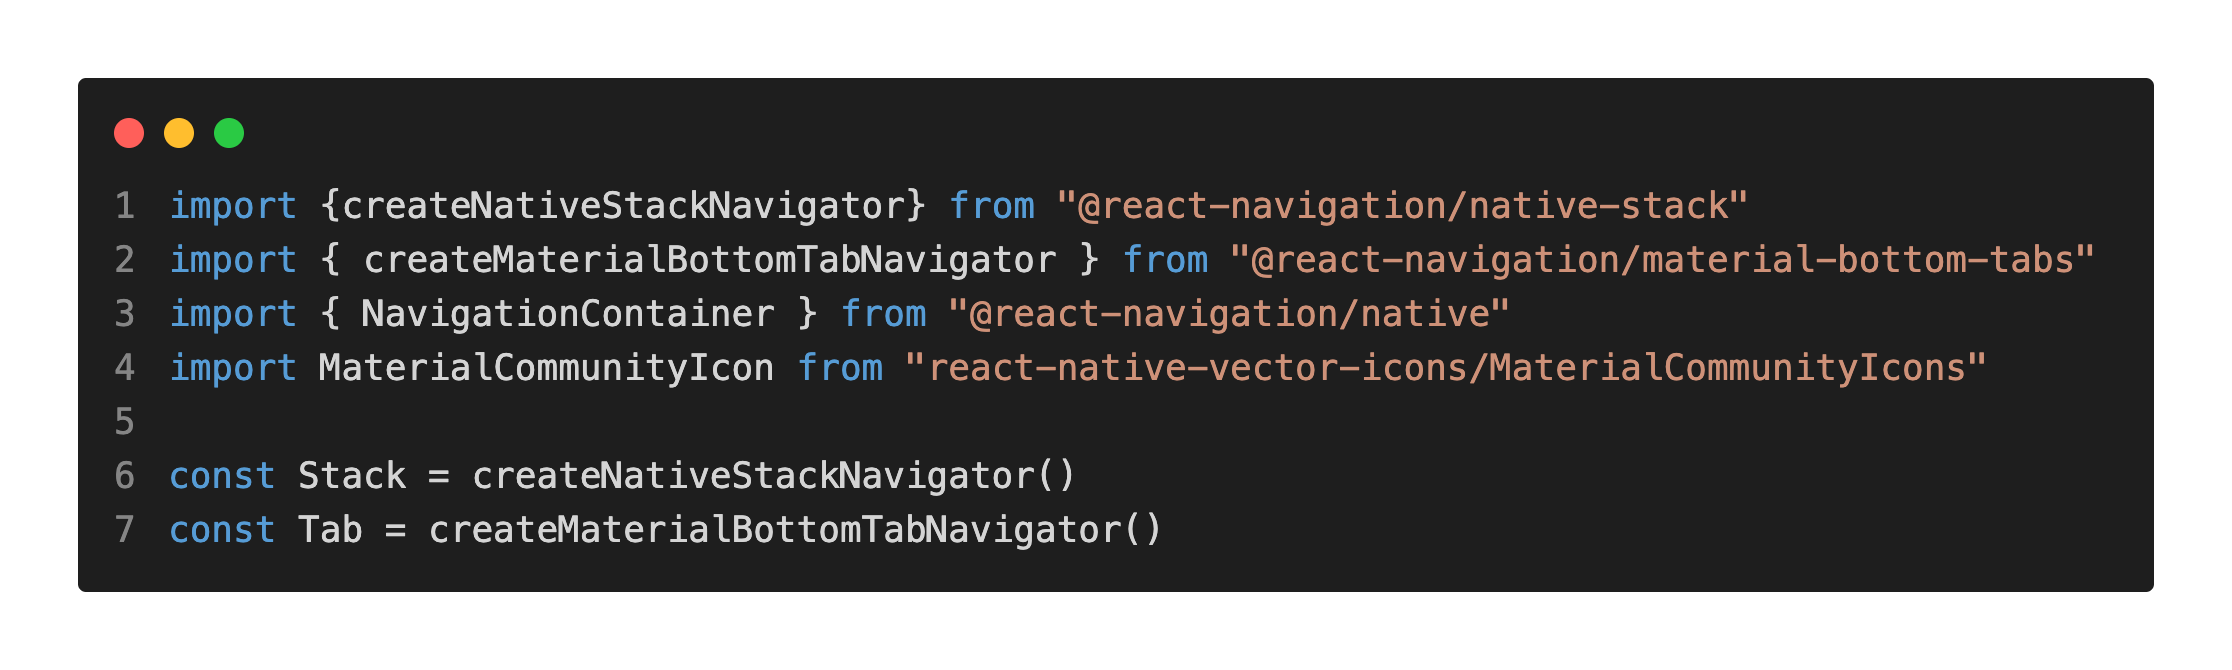
Then go to ios folder and run "pod install" and import the components you'll use. Create the navigators you want to use:
You can add the components you want to display on the screens:

Wrap the whole app in NavigationContainer. Let's see an example of the Material Bottom Tabs Navigator:

Material Bottom Tabs Navigator
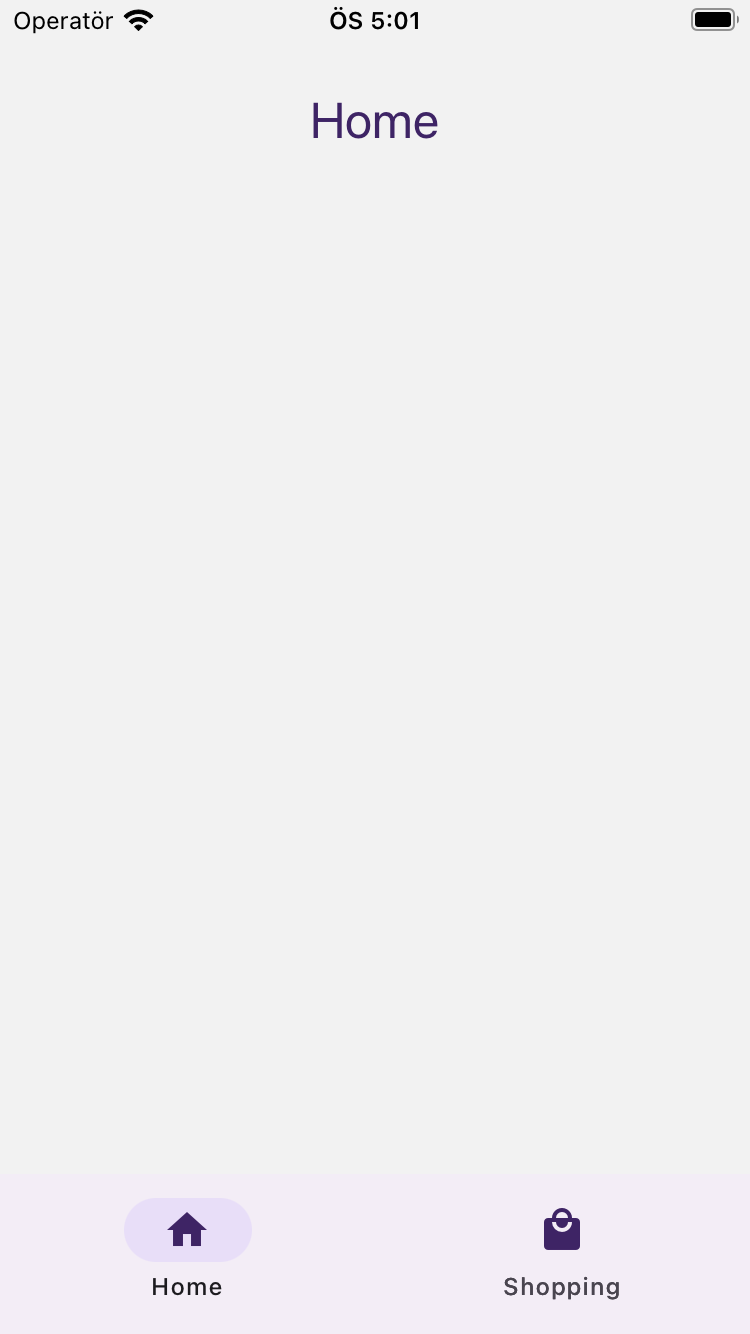
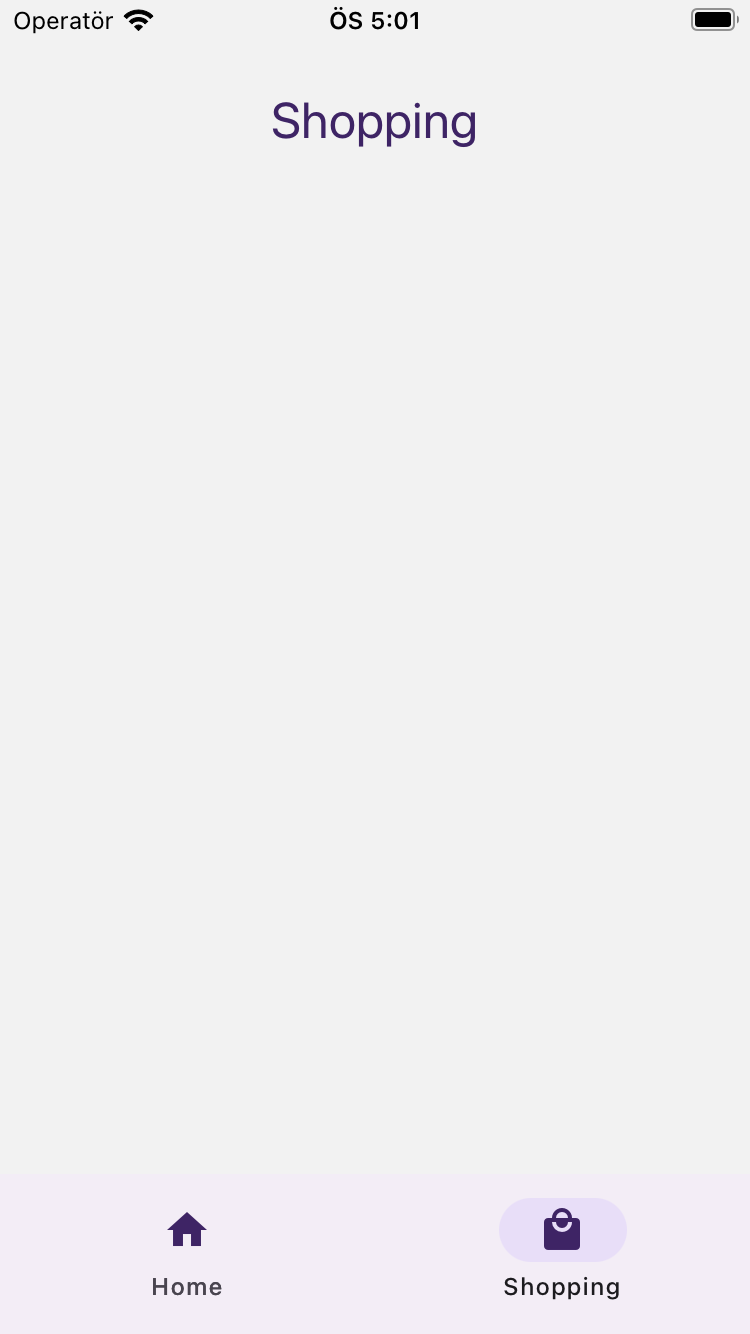
You can see in the example above how the Material Bottom Tabs look.
In the example above, we used React Native Paper for building the UI components. If you want to learn more about this library and how to use it effectively, check out our detailed React Native Paper guide.
We also incorporated React Native Vector Icons in the example above. To explore how to add scalable icons and customize them in your projects, see our React Native Vector Icons tutorial.
For a deeper understanding of both workflows, take a look at the React Native (Bare) course and the Expo course.